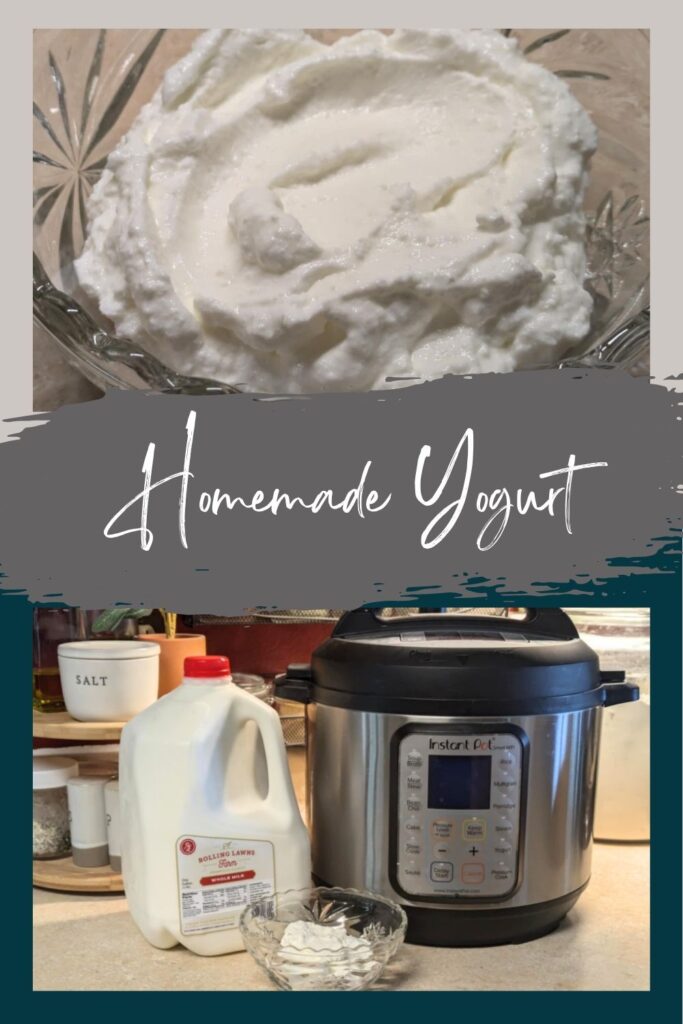
Making this Homemade Yogurt in the Instant Pot couldn’t be easier. And once you make homemade yogurt, you will wonder why you didn’t start sooner!
Why you’ll love this recipe?
Simple – While this recipe does take time, it is only about 10 to 15 minutes hands on which is why it is so simple.
Quality Control – You get to choose what kind of milk and yogurt base you use. You also get to choose how thick you want your yogurt to be. If you like it thinner, you will just keep it as is once the process is done. If you like it thicker, just strain it to your preference.
Fun for Kids – Even though this recipe seems more technical, it is super easy for the kids to help as well. They get to practice reading and using a thermometer and how a simple process can turn milk into yogurt.
This post contains affiliate links, which means I make a small commission at no extra cost to you. See my full disclosure here.
What ingredients are needed to make this Homemade Yogurt in the Instant Pot?
All you need for ingredients is literally milk and yogurt. How easy is this!
Whole Milk – Let’s talk milk. You can choose the milk you use but whole milk is the most popular and will set the best/thickest. It helps to make it very creamy.
Yogurt – A full fat, whole milk yogurt works the best if you want a thicker yogurt. I look for a plain 5% fat yogurt. Truly, most yogurts work well, you just want the plain one though. You also need to make sure that your yogurt starter is “alive” with live bacteria. You only need 1/4 cup so even a single serve would work great.
Pin for later!
Tools you may need for your recipe:
Instant Pot (with yogurt function)
How to make Homemade Yogurt in the Instant Pot…
Ok, let’s get to the how-to, shall we? I promise it is simple!
We want to be sure that we are starting off with a clean Instant Pot insert. We don’t want to add any bad bacteria to the mix since we are culturing bacteria to make the yogurt. So just make sure your insert is nice and clean.
You will also want to remove the silicone ring in the lid of the Instant Pot. We aren’t bringing the Instant Pot up to pressure and that silicone ring can hold onto smells. We don’t want yogurt that has a hit of roast in the flavor. You can easily just pull it out and set it to the side. You can also get a glass lid if you don’t want to mess with it. It’s not necessary but can make things easier if you are using your Instant Pot a lot.
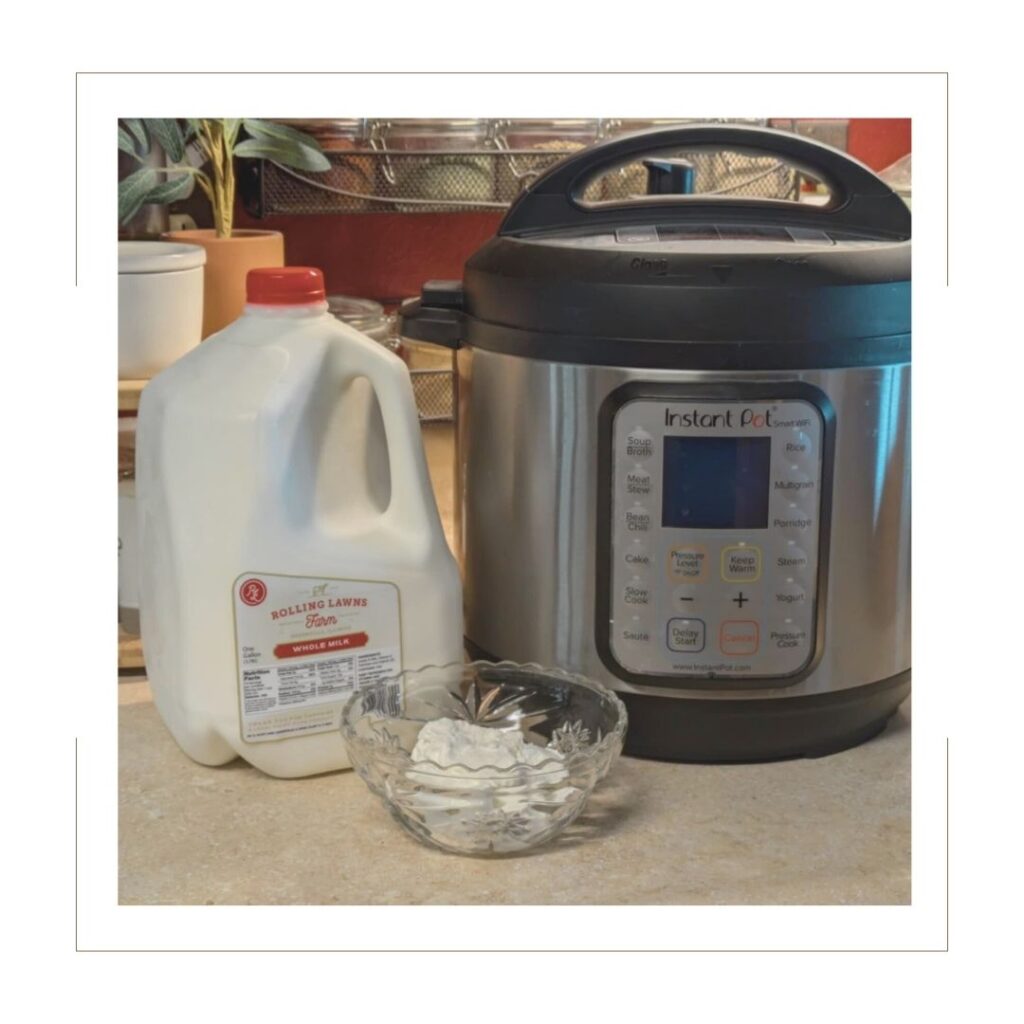
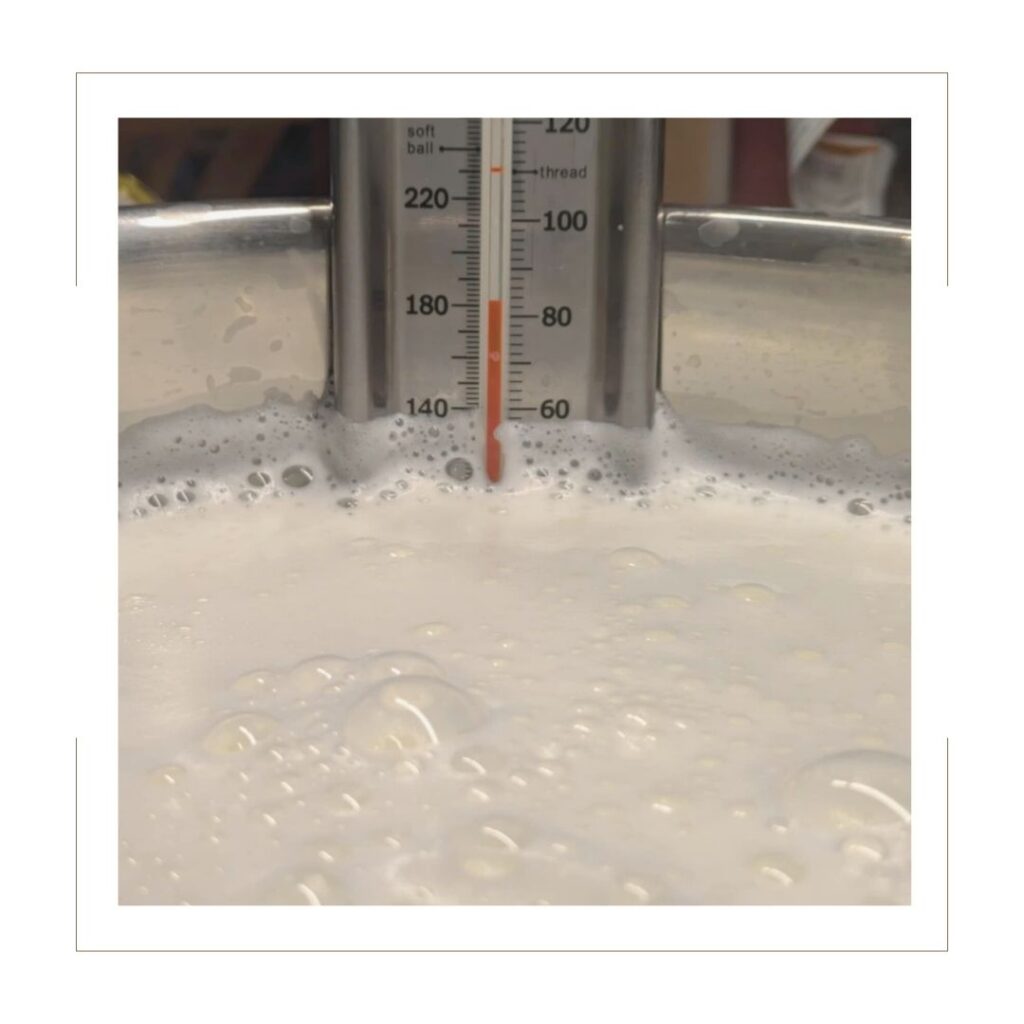
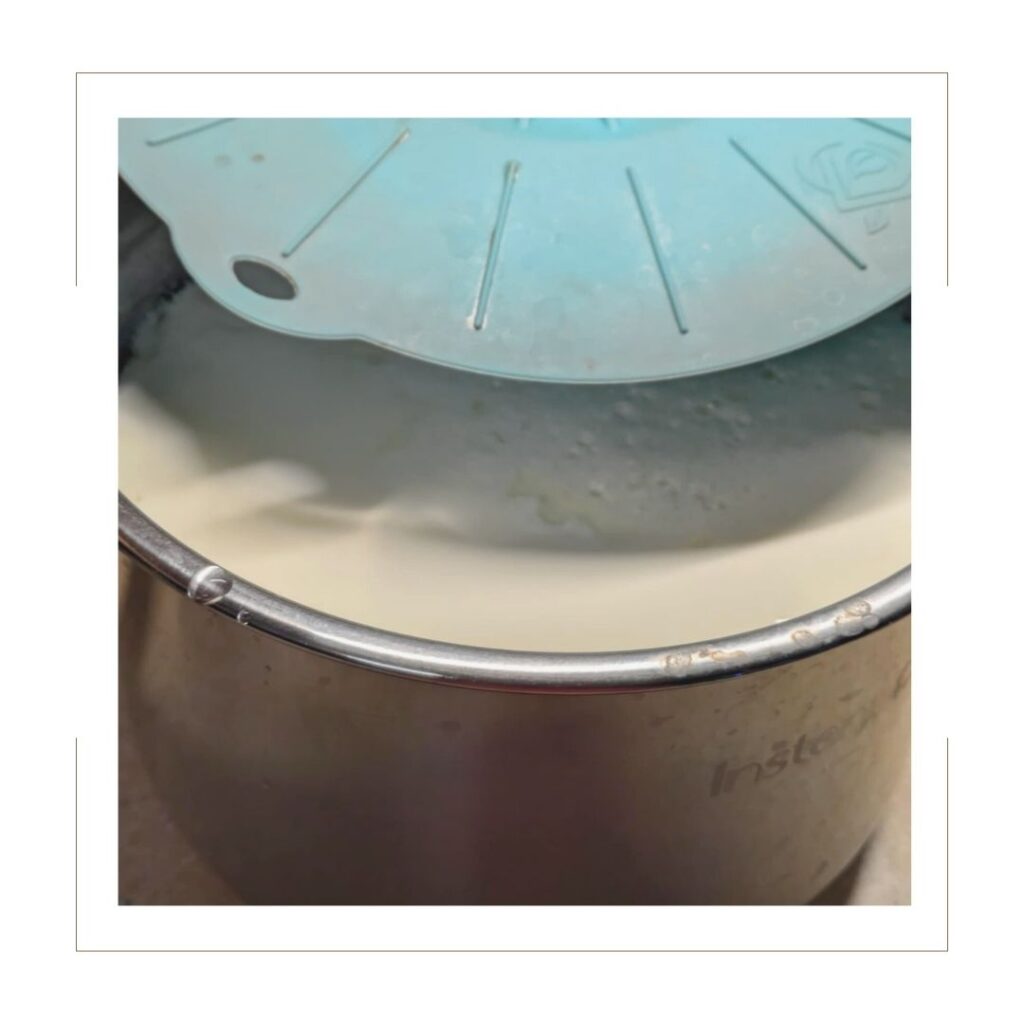
Pour 1/2 to 1 gallon of milk into the Instant Pot insert. Select the sauté function. The milk needs to be brought up to 180 degrees. This is the most hands on you will have to be. You will want to keep an eye on it and whisk/stir with a wooden spoon every few minutes to be sure it doesn’t burn to the bottom.
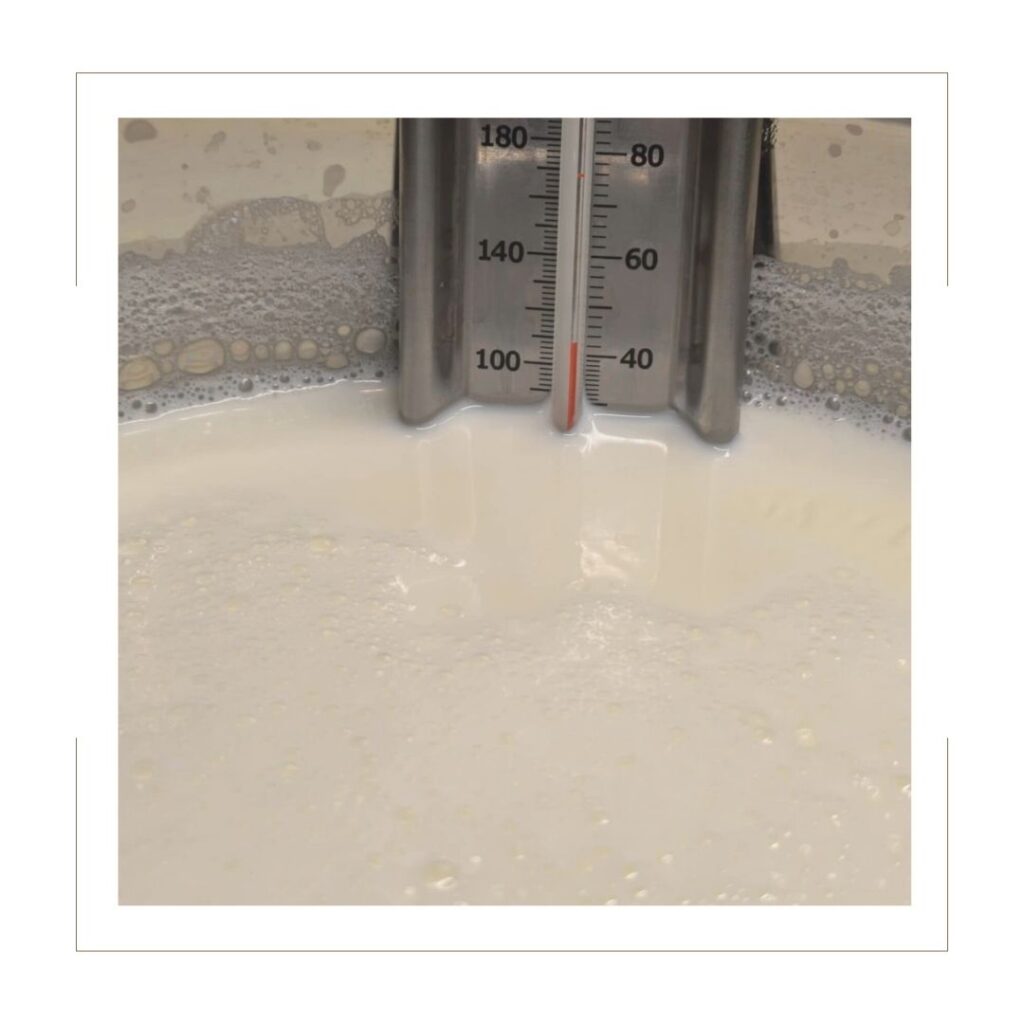
Once the milk reaches 180 degrees you will pull out the insert and set it aside on a heatproof surface. The goal is to reduce the temperature back down to 110 degrees. This will typically take about 1.5 hours or so. We want to reduce the temperature, so it won’t kill the live cultures in the yogurt that we add in.
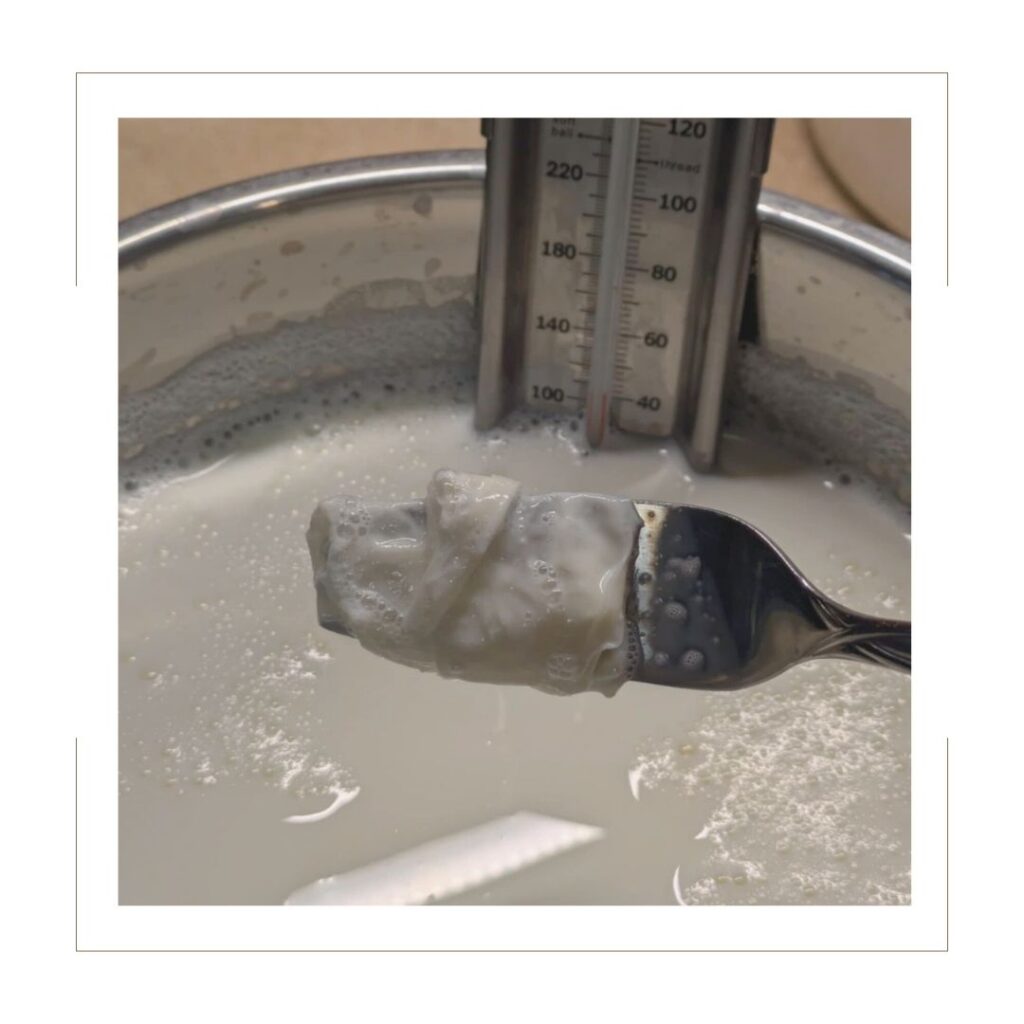
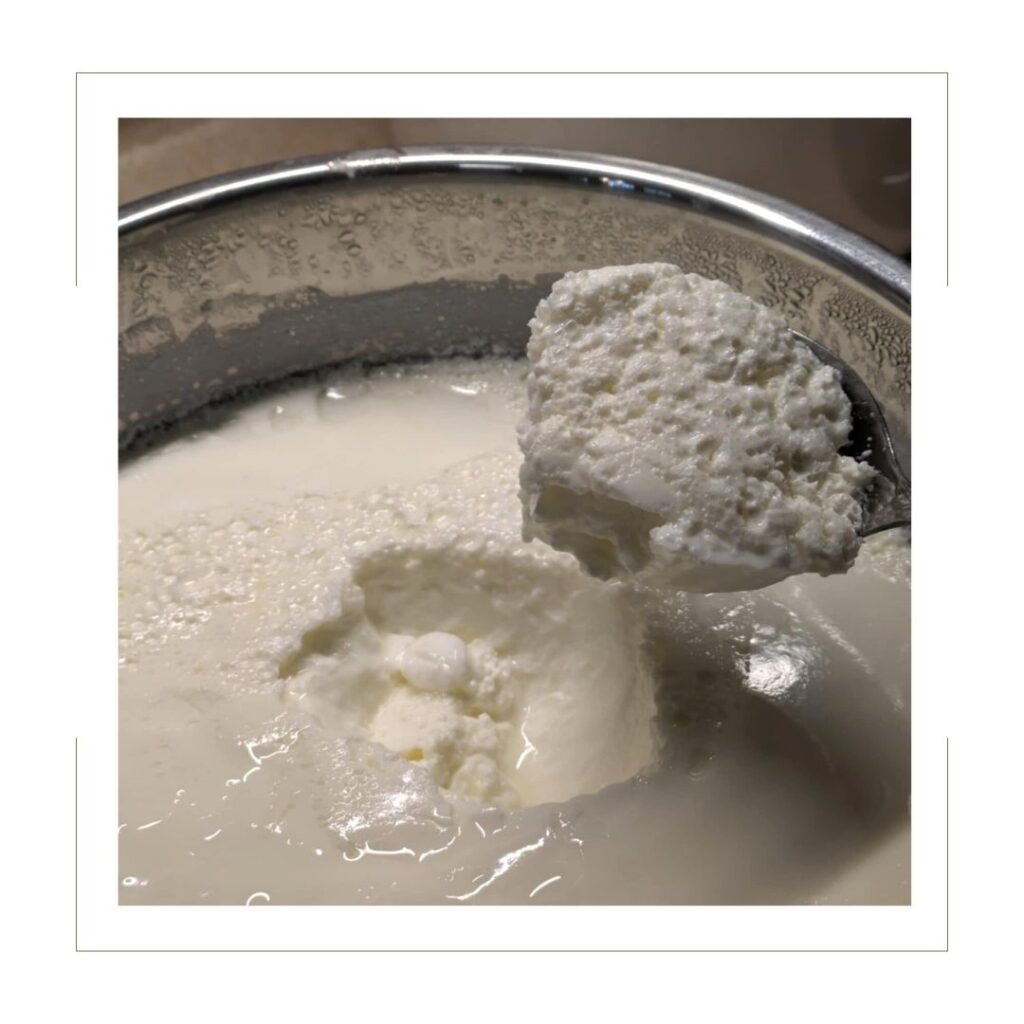
After it cools down to 110 degrees be sure to use a fork to remove the “skin” that will have developed on the top of the yogurt. Technically you can whisk this in but it will leave you with a texture randomly throughout. It’s super easy to remove.
Now it’s time to whisk in the yogurt “starter”, which is just the yogurt you bought to get started. If you used 1/2 gallon of milk, you will only need about 2 tablespoons. If you used the full gallon, you will use 1/4 cup of the yogurt. Just whisk it in.
Now is the time to place your Instant Pot insert back into the Instant Pot. You will add your lid to control the temperature and press the yogurt button until it reads 8 hours. Now you can just go back about your day and the Instant Pot will do its thing.
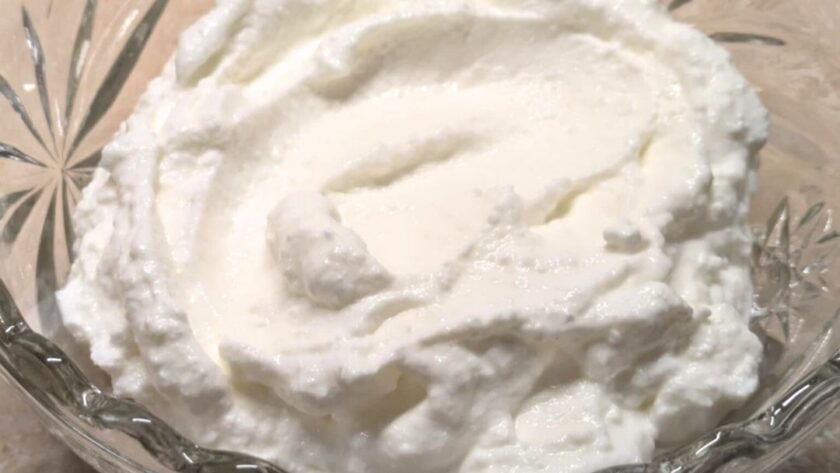
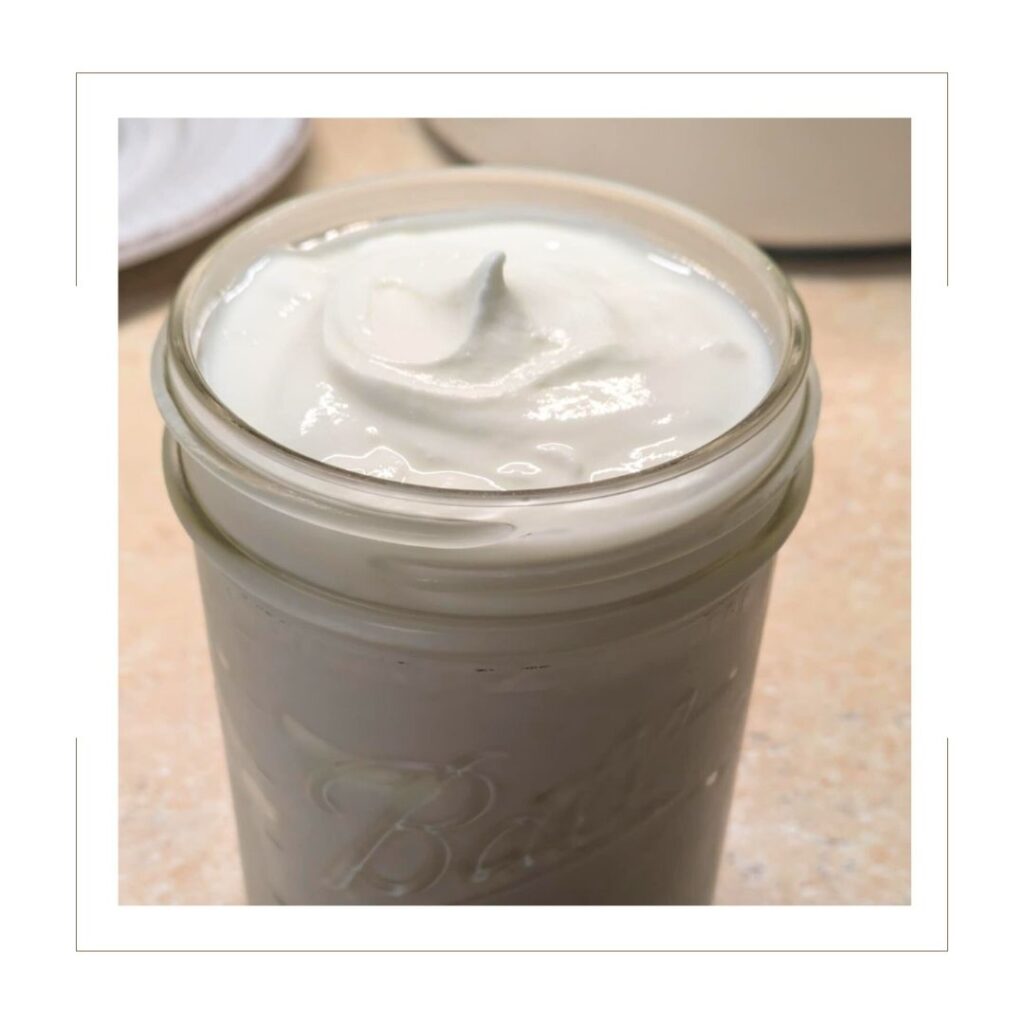
Once your 8 hours are up, you will take the Instant Pot Insert back out and chill it overnight, covered with the silicone lid in the fridge. This will thicken the yogurt.
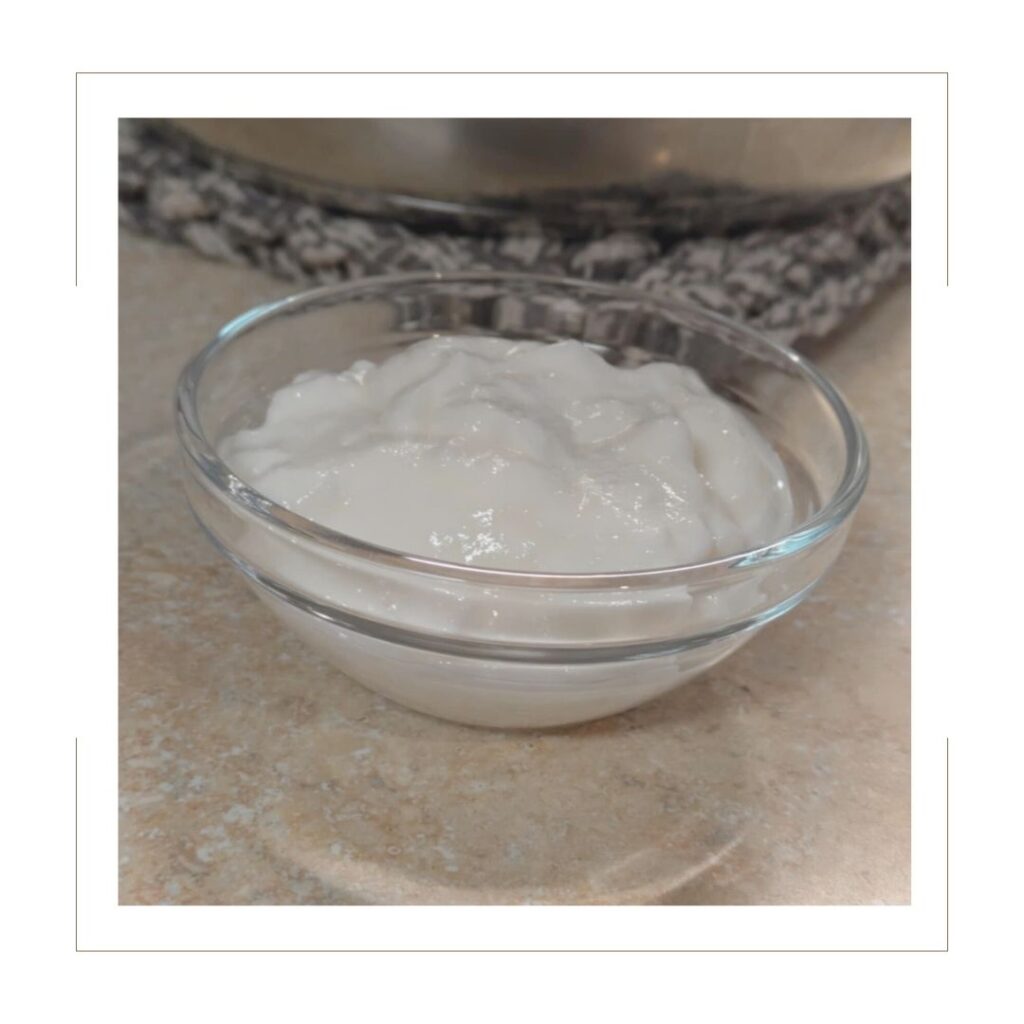
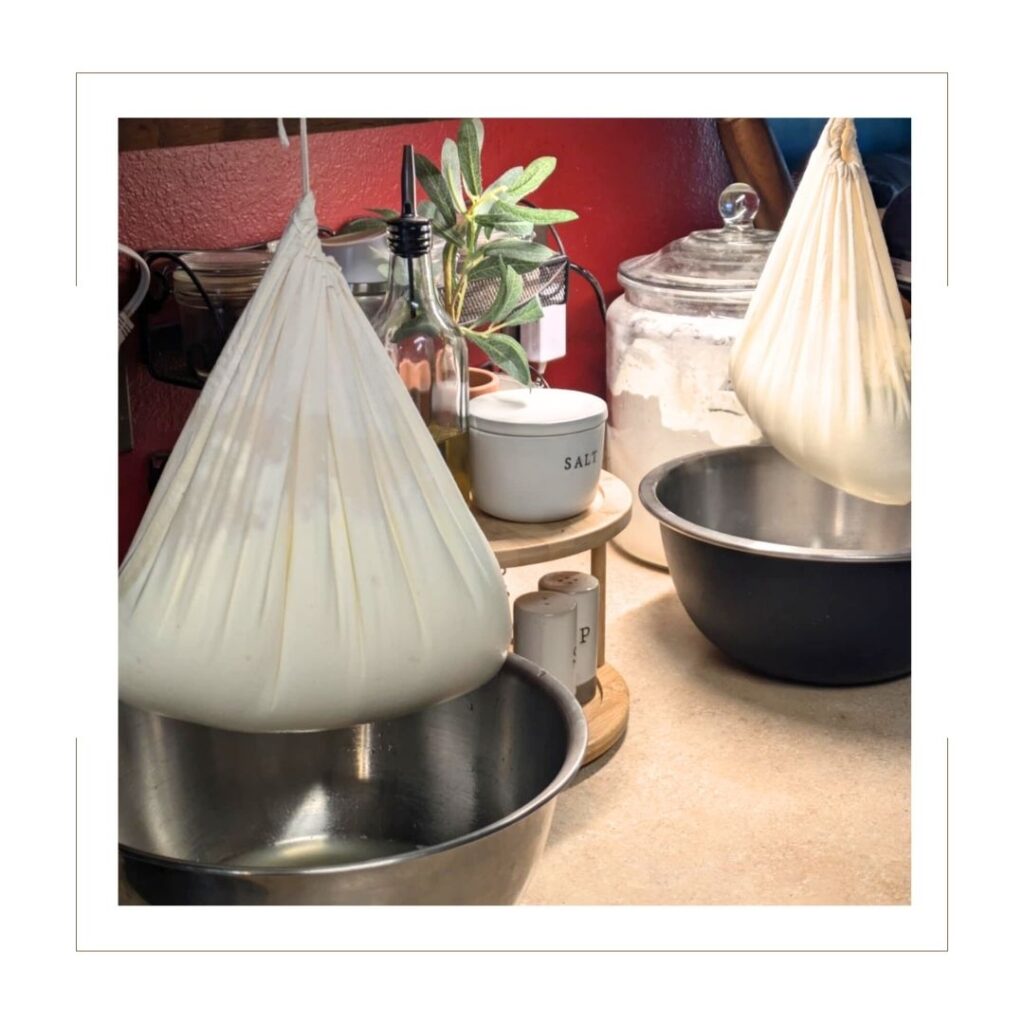
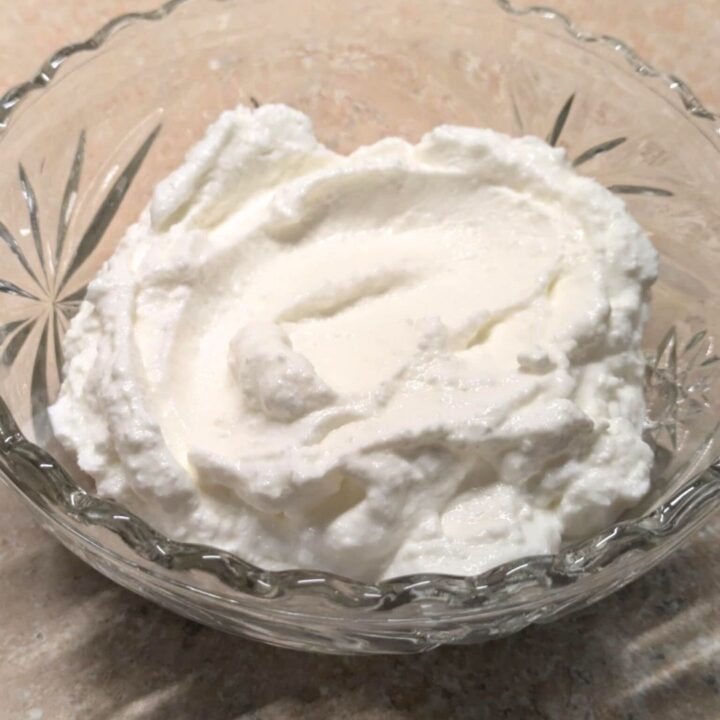
After the yogurt has chilled overnight in the fridge it is basically ready to go. You can eat it as is, or if you like it thicker, more of a Greek yogurt texture, this is the time to strain it. This is just a personal preference as to the consistency that your family likes.
Make sure to save a 1/4 of a cup or so for your next batch of yogurt to use as your “starter”.
I know that it is a bit of a process to read through, but once you go through the motions it will become second nature. It saves so much money and tastes amazing!
FAQs
Why use the Instant Pot?
Simplicity, that is pretty much it. This is the only way I have made yogurt and it was just so simple and easy. The Instant Pot controls the temperature for me so it’s one less thing to think about. You can definitely make yogurt without it, using the oven but this is just the way that I have learned and loved.
How long does it take to make yogurt this way?
It takes about 24 hours from start to finish but the hands on time is only about 10 to 15 minutes.
What type of store-bought yogurt do I need to use for this starter?
My favorite is Fage 5% fat yogurt to get the initial batch going. I like the higher fat content to get started. Two of the biggest things though are to be sure that the yogurt has live cultures and that it is just a plain yogurt.
What type of milk should I use?
I have only used whole milk for this recipe because that is what we drink and the texture/consistency that we like. You can definitely experiment though. Your results may vary depending on what you use.
Can I reuse the homemade yogurt as a starter from the next batch?
Yes! Just set some aside from your current batch. Be sure that you do this BEFORE you sweeten or add flavor if you choose to. You will want about 1/4 of a cup if you are using a full gallon of milk.
Can I flavor the yogurt?
Definitely! That is one of the best things is that you can take a plain yogurt and flavor it the way you like. You can use maple syrup, honey, vanilla, berries, jam or just keep it plain and flavor it as you eat it. You will just want to wait to flavor it until after it has cooled and you have strained it if you chose to do so.
Looking for more delicious recipes? Try these out!
Salted Chocolate Covered Peanut Butter Date Bites
Easy Banana Nut Muffins
Simple Homemade Fluffy Waffles
Chocolate Chip Oatmeal Smoothie
Easy Fluffy Pancakes
Triple Chocolate Protein Muffins
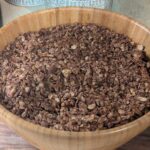
Chocolate Granola
If you try this recipe and love it, I would love if you could come back and give it 5 stars! Don’t forget to leave a review and feel free to snap a photo and share it on Facebook or Instagram. I love seeing my recipes come to life!
I’d love for you to follow along @julie.natruallychaotic over on Instagram!
Thanks for stopping by, see you next time!
Homemade Yogurt in the Instant Pot
Making this Homemade Yogurt in the Instant Pot couldn't be easier. And once you make homemade yogurt, you will wonder why you didn't start sooner!
Ingredients
- 1 gallon whole milk (or milk of choice)
- 1/4 cup of active yogurt
Instructions
- We want to be sure to start off with a clean Instant Pot Insert and remove the silicone ring from the Instant Pot lid.
- Pour 1 gallon of whole milk into the Instant Pot insert. Select the sauté function. The milk needs to be brought up to 180 degrees, whisking or stirring as needed to be sure that the milk doesn't scorch on the bottom.
- Once the milk reaches 180 degrees, pull the insert and set it aside on a heatproof surface.
- The temperature needs to reduce back down to 110 degrees. This will take about 1.5 hours or so. We want to be sure to reduce the temperature so that it won't kill the live cultures in the yogurt that we add in.
- After it cools down to 110 degrees, use a fork to remove the skin. Just give it a quick twirl and it will easily wrap around the fork.
- Whisk in your active yogurt.
- Then place your Instant Pot insert back into the Instant Pot. Add the lid (without the silicone ring) back onto your Instant Pot and lock it in. Press the Yogurt button until it reads 8 hours.
- Now the Instant Pot does its own thing maintaining the temperature of the Yogurt.
- Once your 8 hours are up, you will take the Instant Pot Insert back out and chill it overnight covered with a silicone lid in the fridge. The yogurt will thicken overnight.
- After the yogurt is chilled overnight it is ready to go. You can eat it as is or if you like it thicker, this is the time to strain it.
- Once you have it to the consistency that you like, you can enjoy it as is, add fruit or granola or use however you choose to.
- Happy Yogurt Making!
Notes
Be sure to save 1/4 cup of yogurt from your batch to use for your next batch if you plan on making it within a couple weeks.