Homemade bread has a part of my heart, and this Quick Baguette Recipe might just be one of my all-time favorites to make! There is something so satisfying about pulling a golden, crusty baguette out of the oven — and the smell alone is worth every minute. The best part? This recipe only uses five ingredients and comes together faster than you might think. We are talking real, from-scratch baguettes on your table in about an hour!
Why you’ll love this recipe?
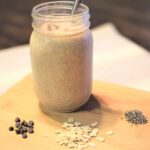
Only five ingredients. Warm water, yeast, sugar, salt, and bread flour — that is it! Nothing weird, nothing you have to hunt down. Simple and clean.
Ready faster than you’d expect. Most homemade bread takes hours of rising time. These quick baguettes only need 30 minutes to rest before they go in the oven. Super fast for from-scratch bread!
The kiddos love helping! Kneading dough is one of those tasks that kids actually get excited about. It’s a great way to get them in the kitchen and involved in making something from scratch.
So much better than store-bought. Once you make these, you will wonder why you ever reached for the packaged kind. Crispy on the outside, soft and chewy on the inside — honestly, there is no comparison!
This post contains affiliate links. If you purchase through my links I may earn a small commission at no extra cost to you. See my full disclosure policy here.
What ingredients are needed for this Quick Baguettes Recipe?
Warm Water — The temperature of your water really matters here! You want it warm, like bathwater, not hot. If it’s too hot it will kill the yeast and your dough won’t rise. If it’s too cold, the yeast won’t activate. Around 100–110°F is the sweet spot.
Yeast — I use active dry yeast for this recipe. Three tablespoons sounds like a lot, but it’s what gives these baguettes a nice rise in a shorter amount of time. You can find yeast at any grocery store or I love this one from Amazon!
Sugar — Just two teaspoons. The sugar feeds the yeast while it blooms and helps everything get nice and active. You won’t taste sweetness in the finished bread at all.
Celtic or French Salt — I love using a good quality salt in my baking, and Celtic sea salt or French grey salt are two of my favorites. They have a wonderful mineral flavor that really comes through in simple recipes like this one. You can find these at most health food stores, Thrive Market, or on Amazon.
Bread Flour — Bread flour has a higher protein content than all-purpose flour, which gives your baguettes that chewy, bakery-style texture. If all you have on hand is all-purpose flour, it will still work! I order quite a few of my baking supplies from Thrive Market. They make it so easy to find clean ingredients and ship straight to my door. If that is something you are interested in, here is a link to try it out and you can get 40% off your first order! Azure Standard is another great option especially if you are looking to purchase in bulk! Everything can also be found in the grocery store too!
Pin for later!
Tools you may need
Baguette Pan — This is the one tool that really makes a difference! A baguette pan holds the loaves in shape as they bake and helps them get that classic long, rounded form. You can use a regular baking sheet in a pinch, but if you plan to make these often, the pan is so worth it.
Large Mixing Bowl— You need plenty of room to mix and knead the dough right in the bowl before turning it out.
Bench Scraper — This is such a handy little tool! It makes dividing the dough into four equal pieces so clean and easy. I reach for mine constantly in the kitchen.
Measuring Cups and Spoons— Accurate measuring really does matter in bread baking, especially with the yeast and salt!
How to make Quick Baguettes
Step 1: Bloom your yeast.
Add your warm water, yeast, and sugar to a large mixing bowl and give it a stir and cover. Then set it aside for about 5–10 minutes. You are looking for it to get bubbly and foamy — that’s how you know the yeast is alive and happy! If nothing happens after 10 minutes, your water may have been too hot or your yeast might be old. It’s worth starting fresh before adding your flour.

Step 2: Add the salt and flour.
Once your yeast is nice and bubbly, add in your salt and start adding your bread flour, one cup at a time, mixing as you go. You want to add enough flour until the dough pulls away from the sides of the bowl and isn’t sticky — usually right around 5½ cups, but you may need up to 6. Mix it all together until a shaggy dough forms.
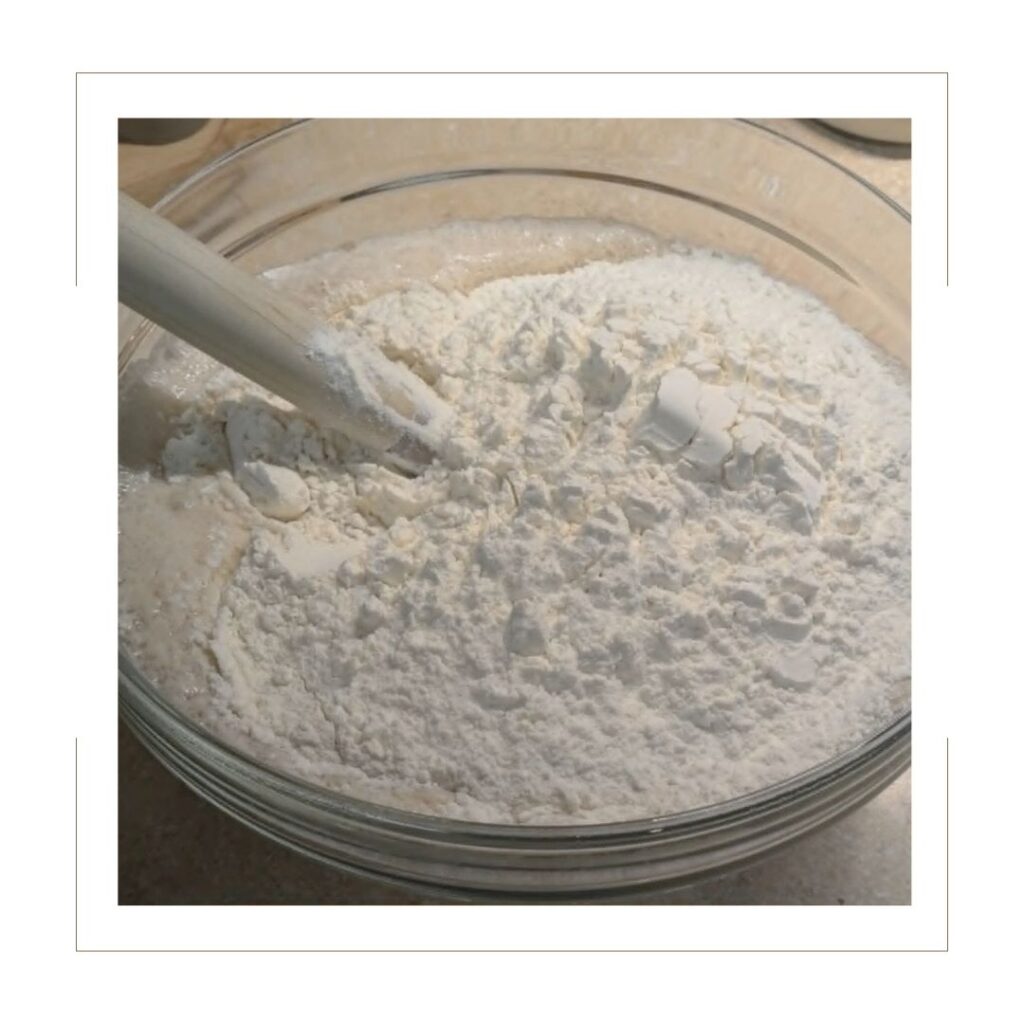
Step 3: Knead the dough.
Turn the dough out onto a lightly floured cutting board or counter and knead it for a few minutes until it’s smooth and elastic. You’ll know it’s ready when it bounces back a little when you poke it and has a nice, smooth surface. Kneading only takes about 5 minutes, so don’t be intimidated!
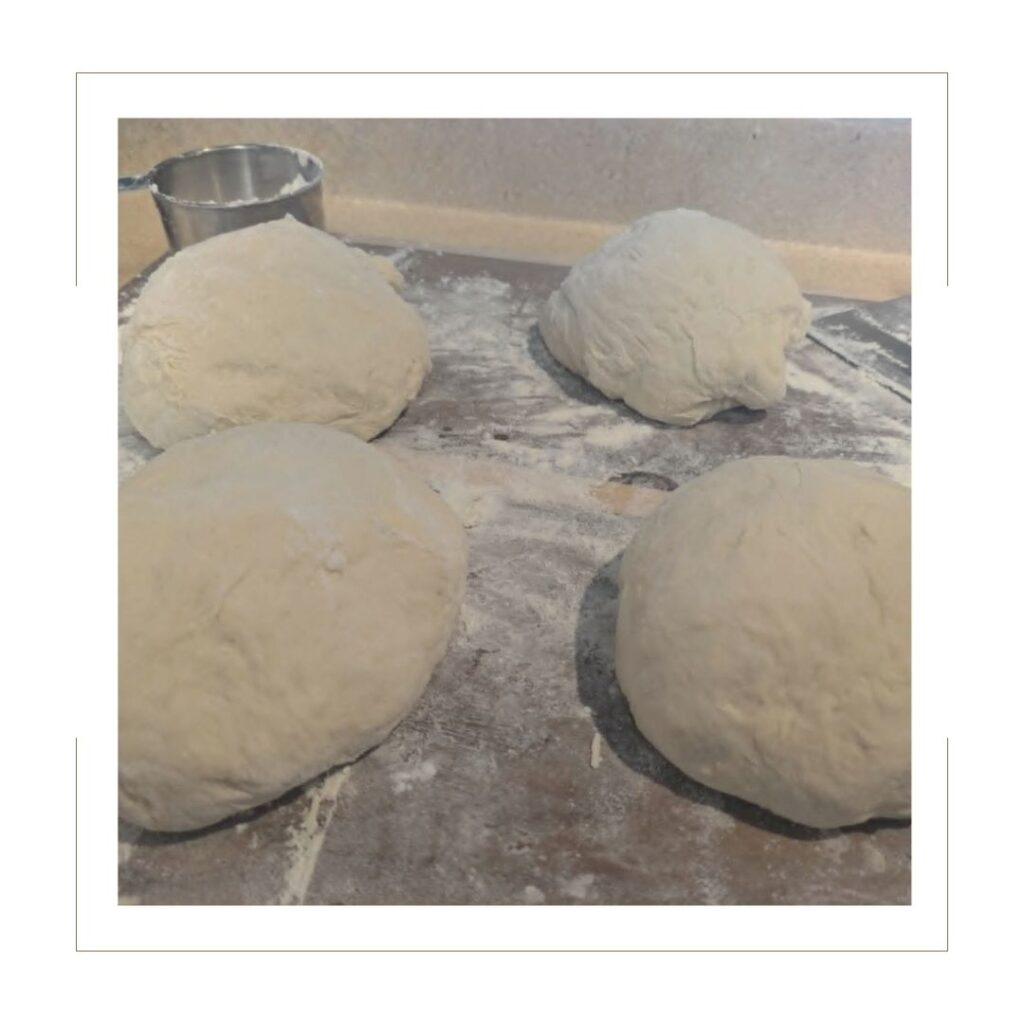
Step 4: Divide into fourths.
Use your bench scraper to divide the dough into four equal pieces. Then take each piece and knead it briefly into a smooth, tight ball. This helps create that nice structure in each baguette before you shape them.
Step 5: Shape your baguettes.
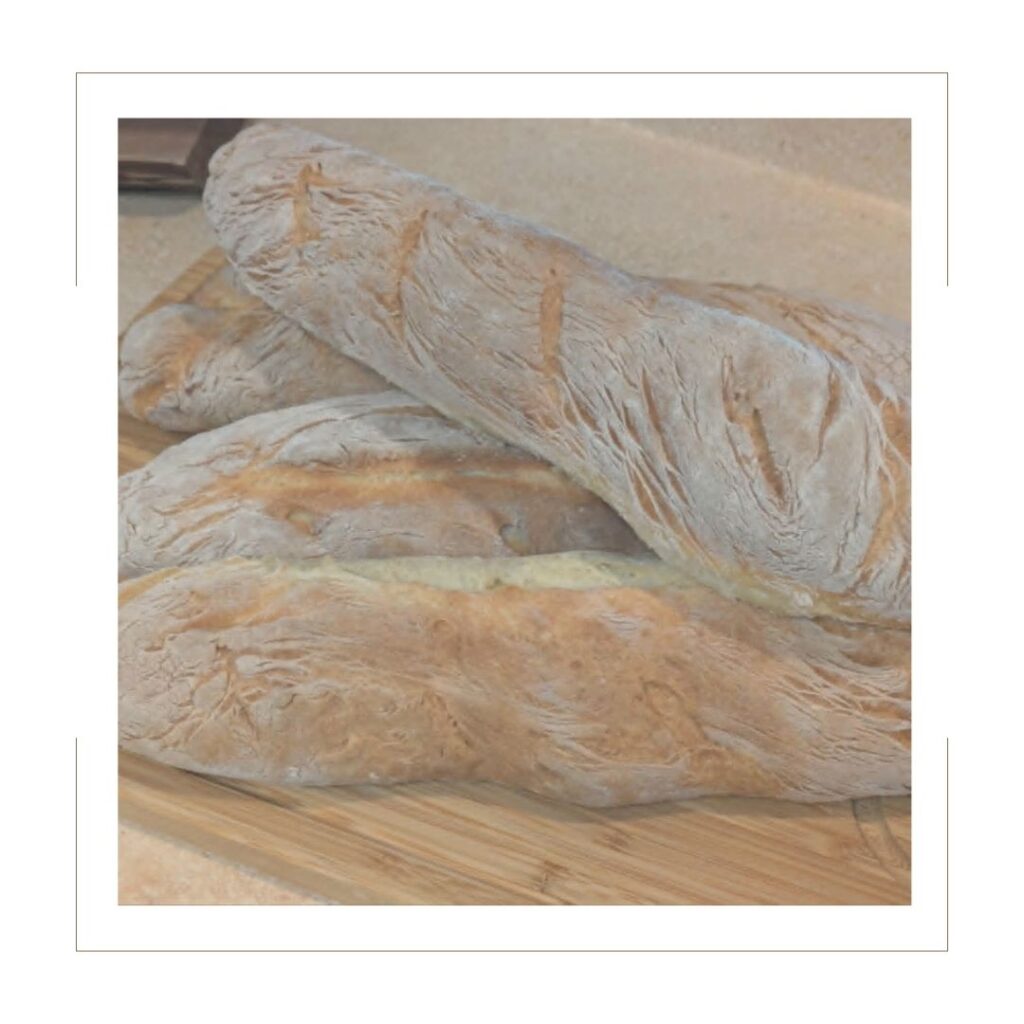
Take each dough ball and roll it out into a log shape about the length of your baguette pan, or whatever length you’d like. I usually press and roll them gently — no need to be perfect, rustic is totally fine! The pan does a lot of the work holding the shape.
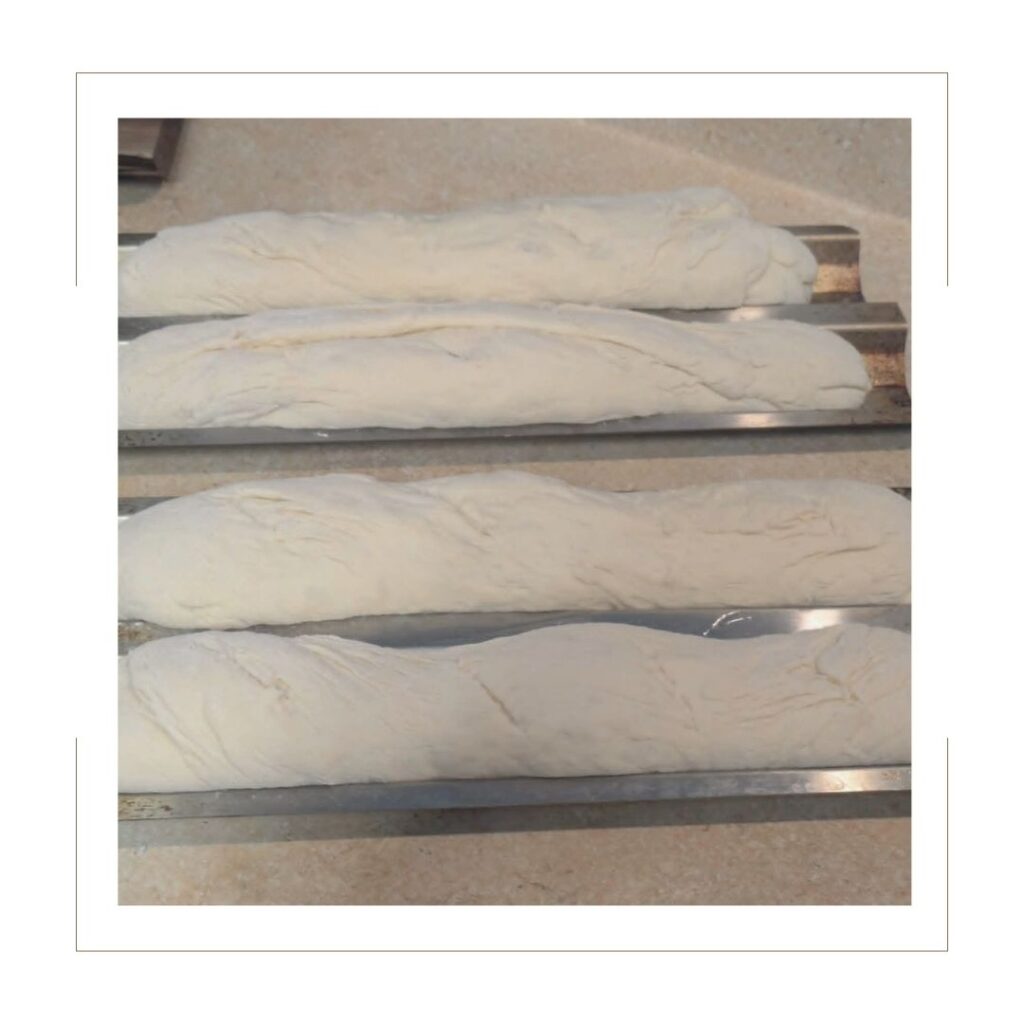
Step 6: Let them rest.
Lightly grease your baguette pan or baking sheet and lay each formed baguette into it. Cover with a clean kitchen towel or plastic wrap and let them rest for 30 minutes. The hard part — leaving them be! I know it’s tough when you are excited, but that rest time is what gives them a nice rise and light texture.
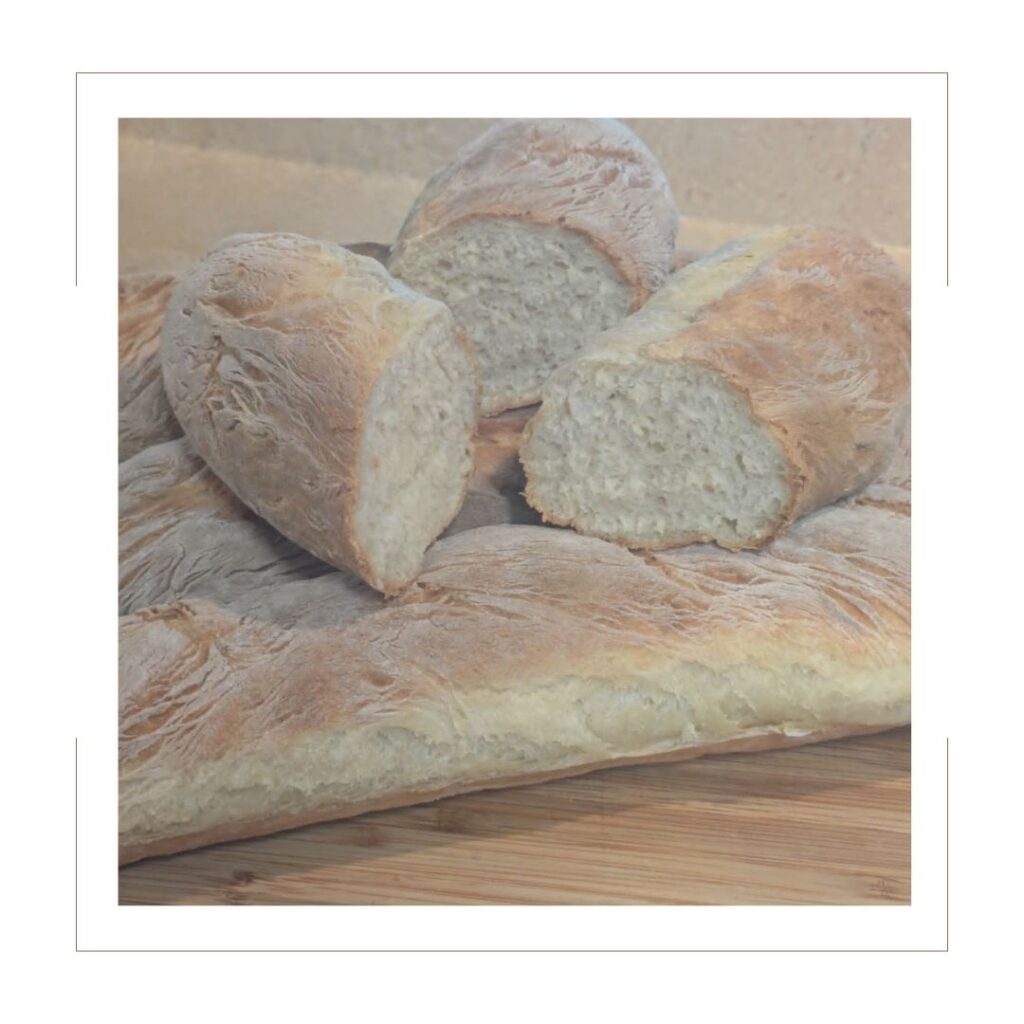
Step 7: Bake!
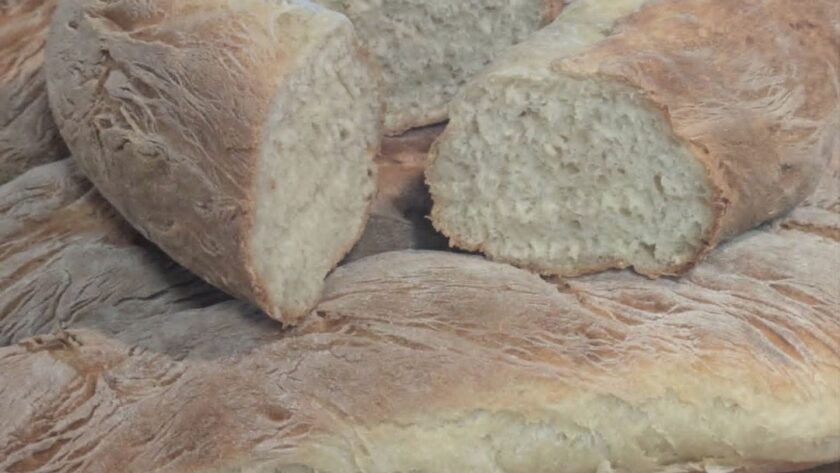
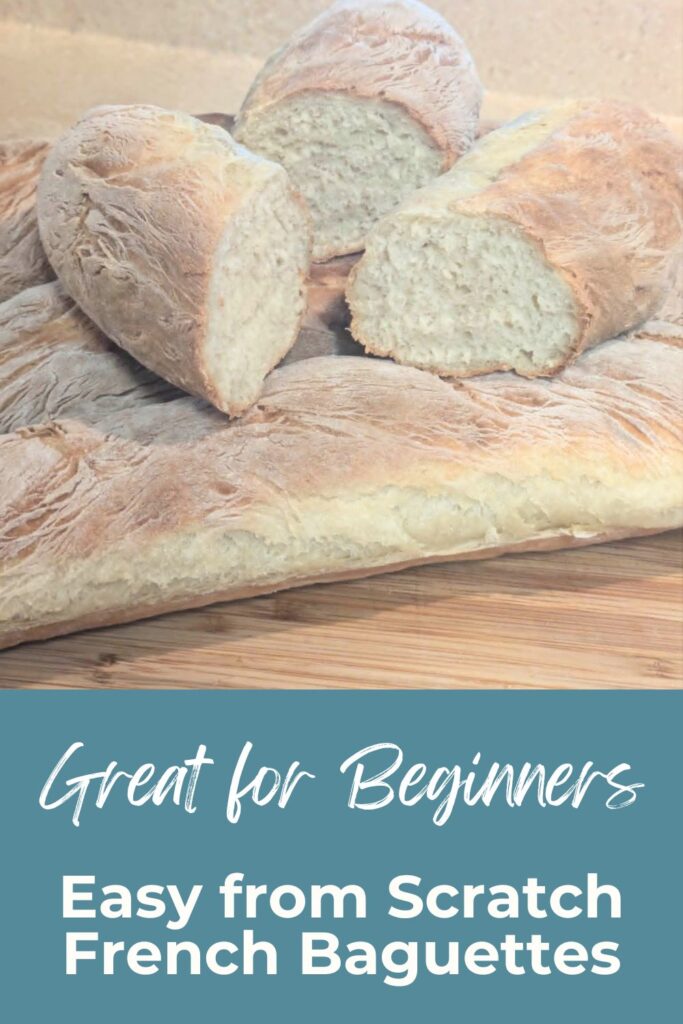
Preheat your oven to 450°F. Once your baguettes have had their 30-minute rest, pop them in the oven and bake for 15–20 minutes, until they are golden brown and sound hollow when you tap the crust. Keep an eye on them after 15 minutes — every oven is a little different!
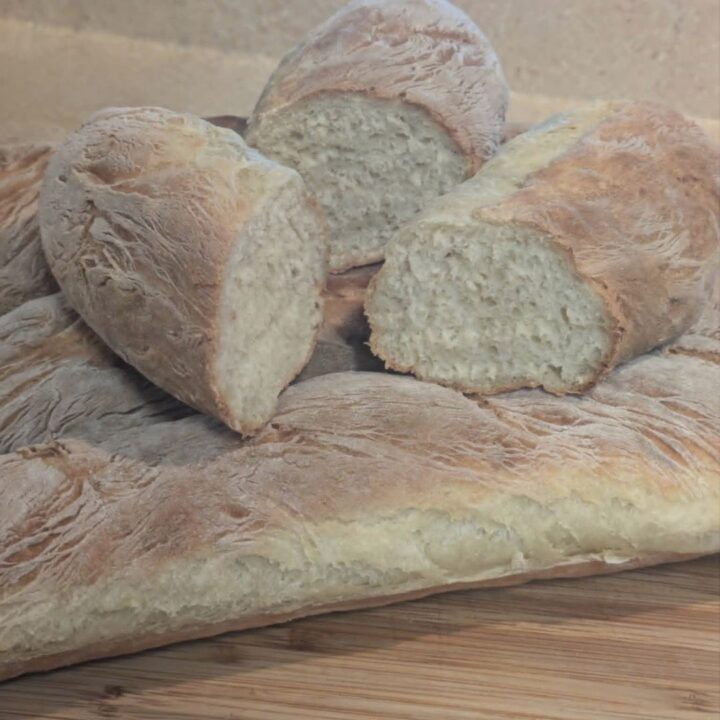
Pull them out of the oven and try to let them cool just a little before you slice in — I won’t judge you one bit if you can’t wait though! Warm baguette with real butter is honestly one of life’s best things.
FAQs
Can I use all-purpose flour instead of bread flour?
Yes! All-purpose flour will work in this recipe. The texture won’t be quite as chewy and the crust won’t be quite as crispy as with bread flour, but they will still be delicious. If bread flour is what you have, use it — if all-purpose is what’s in the pantry, you are good to go!
How do I know if my yeast is working?
After mixing your water, yeast, and sugar, you should see the mixture get foamy and bubbly within about 5–10 minutes. That foam is your sign that the yeast is alive and active. If nothing happens, your water may have been too hot (above 115°F can kill yeast) or your yeast may be expired. Check the date on your yeast package before you start!
Can I freeze these baguettes?
Yes! Let them cool completely first, then wrap them well in plastic wrap and place in a zip-top freezer bag. They freeze great for up to 3 months. To reheat, pop them straight from the freezer into a 350°F oven for about 10–15 minutes and they’ll be just like fresh. This is great for making a double batch!
How should I store leftover baguettes?
Baguettes are best fresh the day they’re made — that’s just the nature of crusty bread! If you have leftovers, store them loosely wrapped at room temperature and use within a day or two. They make amazing garlic bread or croutons once they start to get a little stale.
Looking for more delicious recipes?
If you loved these Quick Baguettes, here are a few more recipes you might enjoy!
Easy Homemade Sandwich Bread
Easy Homemade Beer Bread
How to Make Sourdough Starter from Scratch
Quick Drop Honey Biscuits
Easy Banana Nut Muffins
Simple Homemade Fluffy Waffles
If you make this recipe I would love it if you left a 5-star rating and review below! It really helps other people find the recipe. And if you share a photo on Instagram, tag me so I can see it — I love seeing my recipes come to life!
I’d love for you to follow along @julie.natruallychaotic over on Instagram!
Thanks for stopping by, see you next time!
Quick Baguette Recipe
A Quick Baguette Recipe with just 5 ingredients - crispy crust, chewy inside, and ready in about an hour. Homemade bread can be so easy!
Ingredients
- 3 cups warm water
- 3 tbsp. active dry yeast
- 2 tsp. raw cane sugar
- 4 tsp. Celtic of French Grey salt
- 5 1/2 - 6 cups Bread Flour (AP will also work)
Instructions
1. Add your warm water, yeast, and sugar to a large mixing bowl and give it a stir and cover. Then set it aside for about 5–10 minutes. You are looking for it to get bubbly and foamy — that’s how you know the yeast is alive and happy!
2. Add in your salt and start adding your bread flour, one cup at a time, mixing as you go. You want to add enough flour until the dough pulls away from the sides of the bowl and isn’t sticky — usually right around 5½ cups, but you may need up to 6. Mix it all together until a shaggy dough forms.
3. Turn the dough out onto a lightly floured cutting board or counter and knead it for a few minutes until it’s smooth and elastic. You’ll know it’s ready when it bounces back a little when you poke it and has a nice, smooth surface. Kneading only takes about 5 minutes
4. Divide the dough into four equal pieces. Then take each piece and knead it briefly into a smooth, tight ball.
5. Take each dough ball and roll it out into a log shape about the length of your baguette pan, or whatever length you’d like. I usually press and roll them gently — no need to be perfect, rustic is totally fine!
6. Lightly grease your baguette pan or baking sheet and lay each formed baguette into it. Cover with a clean kitchen towel or plastic wrap and let them rest for 30 minutes.
7. Preheat your oven to 450 degrees to let it get nice and hot.
8. Once your baguettes have had their 30-minute rest, pop them in the oven and bake for 15–20 minutes, until they are golden brown and sound hollow when you tap the crust. Keep an eye on them after 15 minutes — every oven is a little different!